Active Directory Configuration
Manual of the AD Configuration in our Windows Server
First of all we will have to set up our Active Directory server to manage the workers of the company.
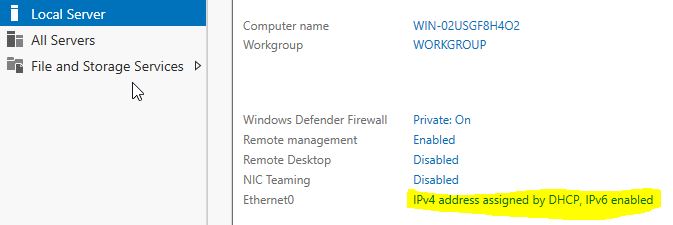
We power up the Windows Server 2019 VM first and will change the name of it first, we need to go to Server the Local Server tab and click on the name and rename it:
After that it will ask us to reboot but I will set up an static IP before rebooting.
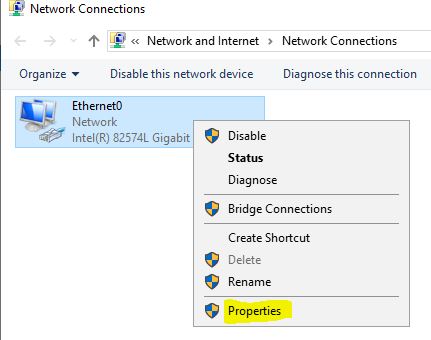
To do that we need to click on the Ethernet options:
Once here we right click and go to properties:
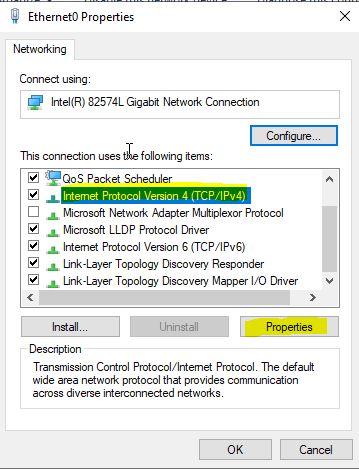
We then select IPV4:
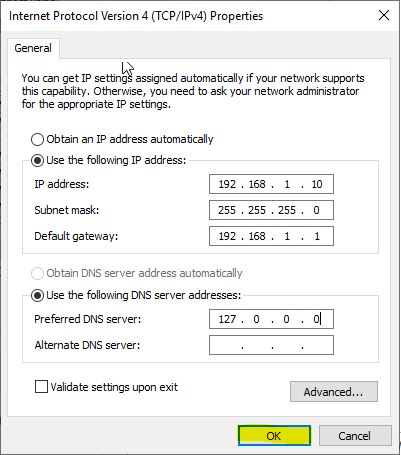
And here we set up our static IP, I’m setting the DNS as itself since this server will also be our DNS server:
Once we have done this we can reboot our server.
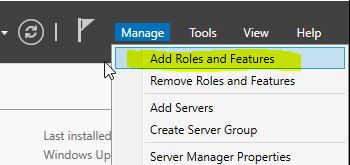
Now we want to add features and rols for our server:
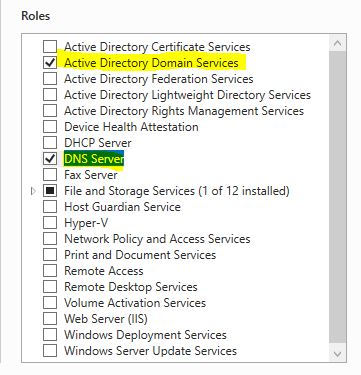
We will add the Active Directory Domain Services and the DNS Server rol:
Once we install it we will see that we have a new notification:
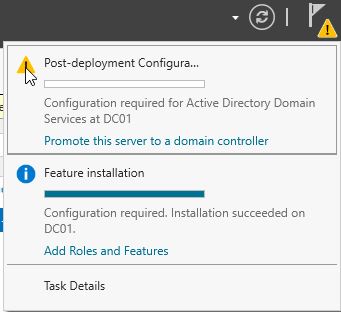
As we see we need to configure the AD Services, we will promote it to a domain controller first.
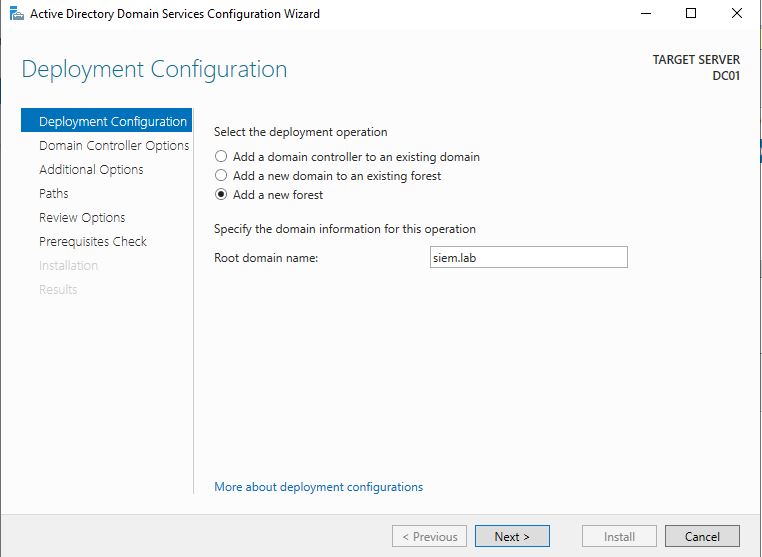
Once we have done that, we will add a new forest, we will call it siem.lab.
On the controller options we will select the latest forest and domain functional level (2016) and we will set a DSRM password for recovery.
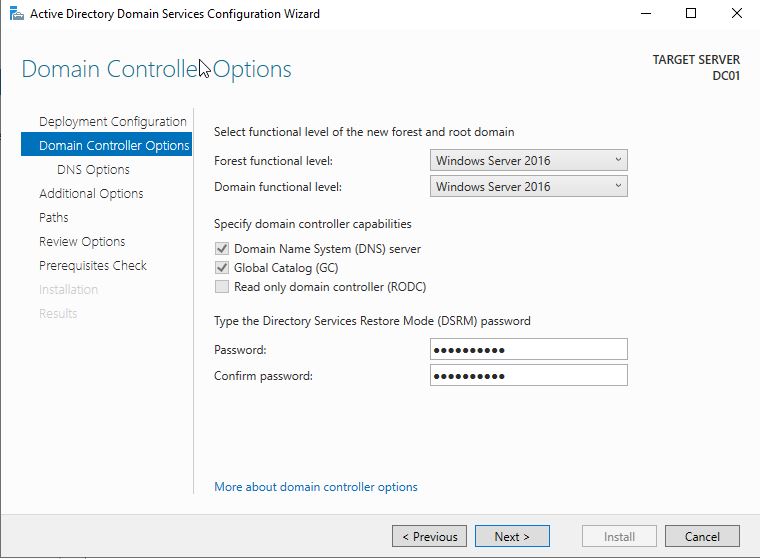
We’re getting a warning in the DNS, we can ignore it and go next:

We will set the NetBIOS domain name as SIEMLAB.
We can leave the paths as default and proceed to install.
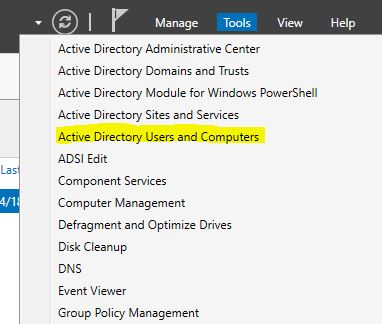
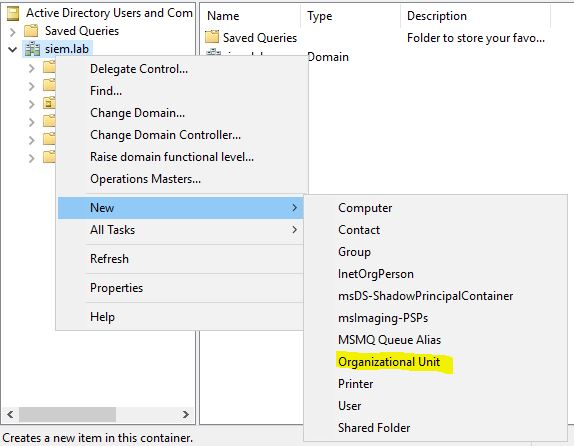
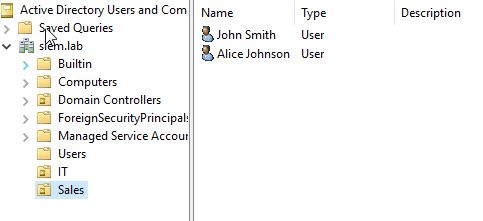
Once the AD server is running we can proceed to create the organizational units and users of our company:
We will add 2 OU: IT and Sales
And we will add the users
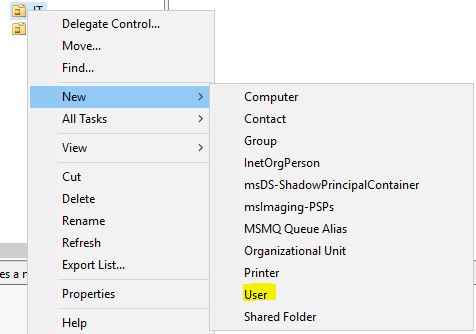
I’ve created 2 users for Sales and 1 for IT (admin.it)
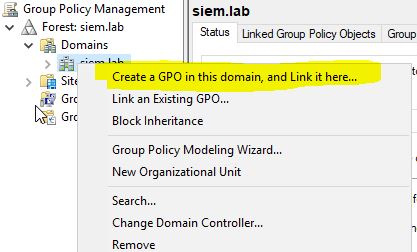
Now we will go to create a Group Policy.

We select the domain and create a new GPO (we will call it SIEM Logging):
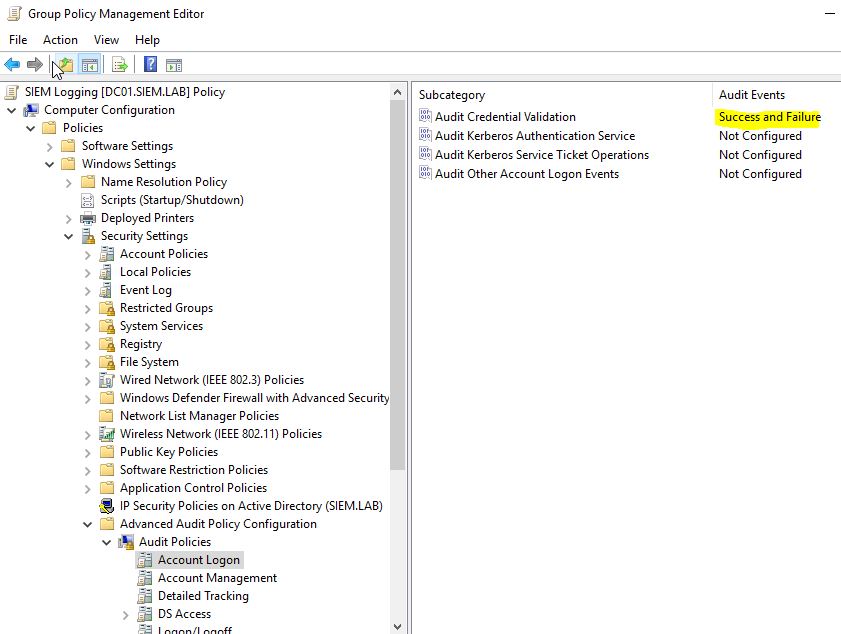
Once created we right-click it and go to edit.
We will go all the way down to Advanced Audit Policy Configuration -> Audit Policies and we will enable (success and failure) the ones on the list:
- Account Logon -> Credential Validation
- Logon/Logoff -> Logon
- Logon/Logoff -> Logoff
- Detailed Tracking -> Process Creation
- Object Access -> File Share
- Object Access -> File System
- DS Access -> Directory Service Access
- Policy Change -> Audit Policy Change
- Account Management -> User Account Management
We will also enable the next Local Policies:
- Audit logon events
- Audit account logon events
- Audit object access
- Audit process tracking

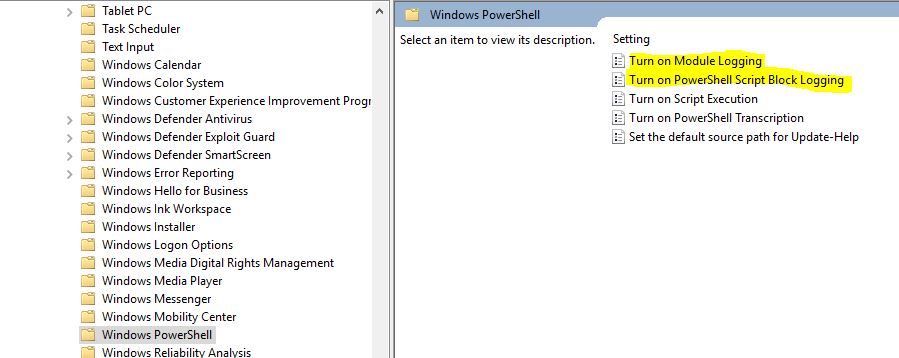
We will also enable the PowerShell logging in Administrative Templates -> Windows Components -> Windows PowerShell. We want to enable Module Logging and PowerShell Script Block Logging:
And that’s all for now for our Windows Server (AD). Next step will be to join our client (Windows10) to the server.