Network and Firewall Configuration
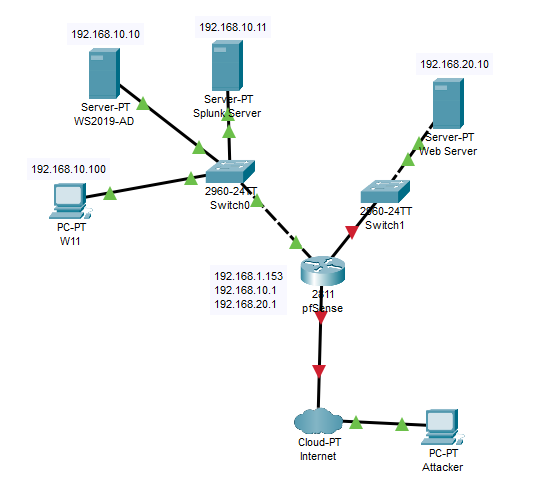
Network esquema with Packet Tracer and pfSense firewall configuration
This post will be about the basic firewall configuration to allow the different networks communicate with eachother and allow the webserver to serve the website publicly.
It’s not a post about the pfSense installation and configuration, might do one for that in the future.
I’ll show you a diagram made with Cisco Packet Tracer to show you how the network should be, which we will then later configure:
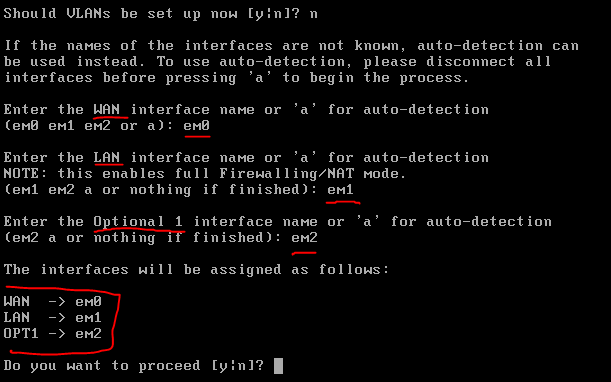
To start we will go to the pfSense machine and assign the interfaces, for that we can just enter the pfSense machine and click into option 1.
I’ve got 3 interfaces, the first one bridged to give me Internet access and the other two are in two different VLAN’s inside de VMWare environment, here it’s the VM network configuration:

And here is how I’m going to set it up: em0 will be the WAN interface (Internet), em1 will be the LAN interface (AD) and em2 will be the opt1 interface (Web Server):
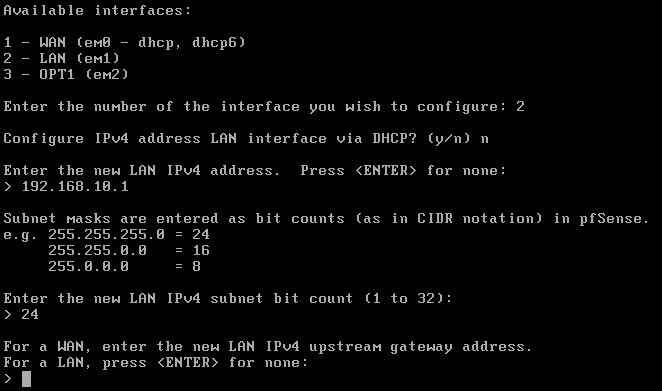
Now we will have to set up the IP addresses so we will click to the option 2.
For the WAN we will use DHCP.
For the LAN we will set it up as 192.168.10.1, without DHCP.
And for the DMZ we will set it up as 192.168.20.1.
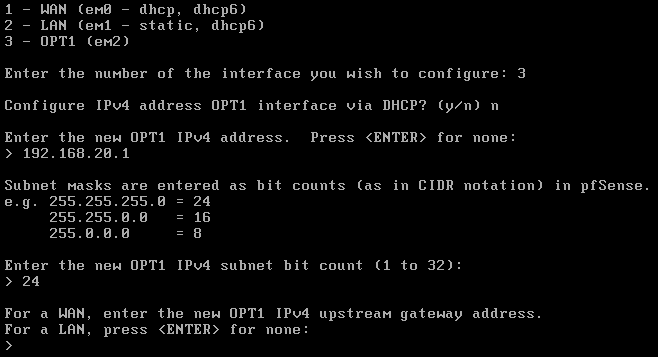
We can now see how all the IP’s are set up correctly:

Once we have the IP’s assigned we can access to the web interface from a machine within the network. I will use the W11 machine for that (usually you would use an IT team machine to do that instead of a workers one, but since I’m not creating IT team machines in this lab I’ll use this machine for admin purposes aswel)
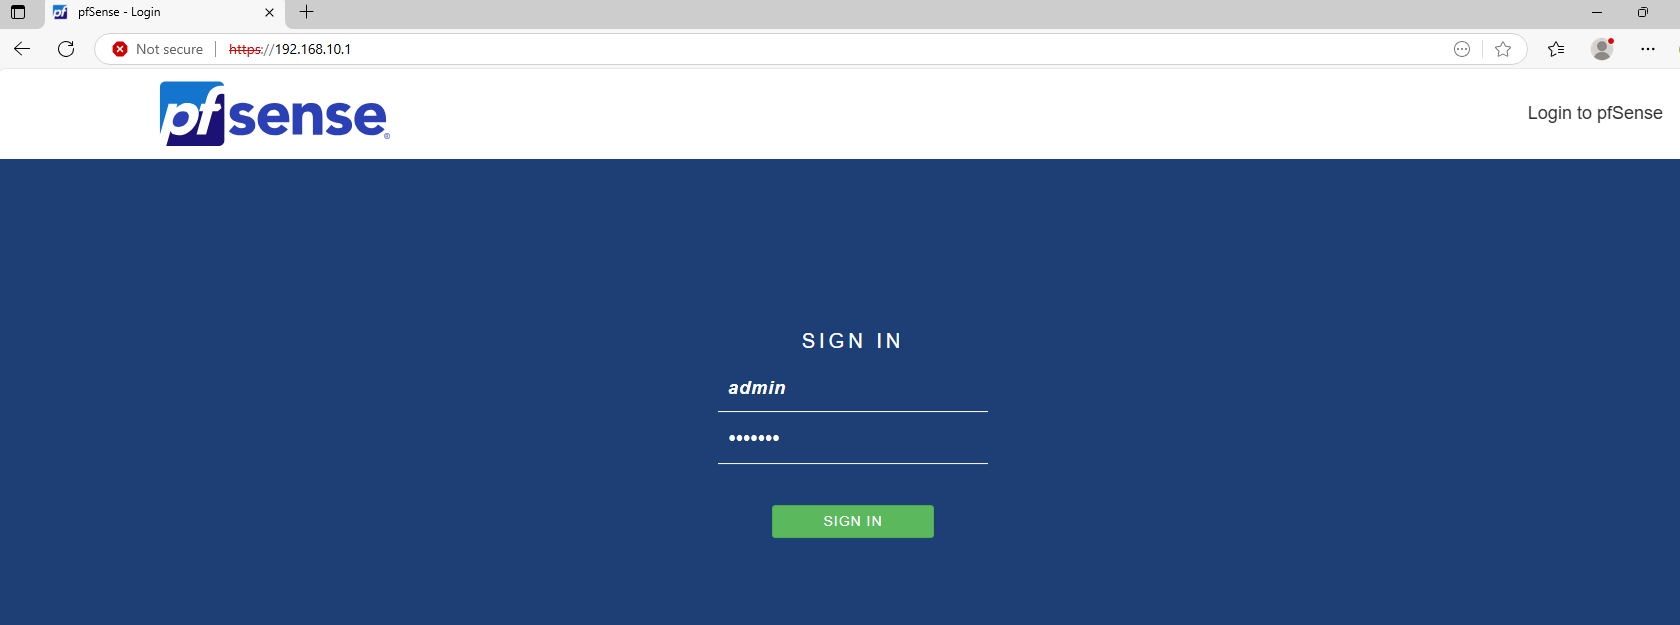
The default credentials are: -Username: admin -Password: pfsense
We should change that the first time we login, I will not change it to see if I can exploit a lazy admin later in this lab.
Once we are in we will follow the wizard installation completing the information:
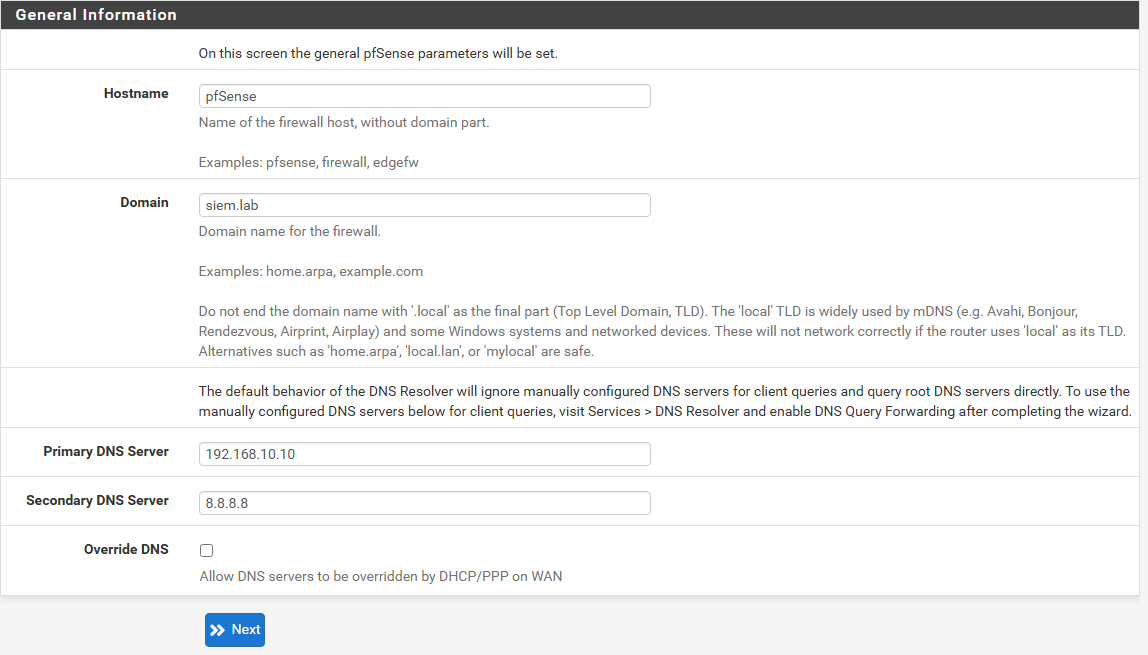
On the next page you just have to adjust the timezone to the correct one and if you want to change the time server hostname, I’ll leave the one by default: 2.pfsense.pool.ntp.org.
On the next page we will configure the WAN interface which we really don’t need to do anything since we will leave it as DHCP and we have already configured it before, same for the LAN interface, it’s static but already configured.
On the next step we should change the admin password for the web interface, which I will not do to create another vulnerability in another network as a lazy admin, but in a real world scenario we should put a really strong password here.
After that we will have the basic configuration finished. We can try to make a ping from the W11 to the webserver for exemple to try it out.
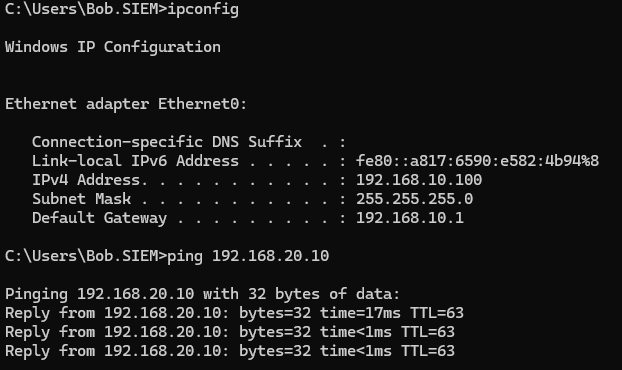
We can see how we are able to ping another network from the W11. Let’s now try and see if we can see the website.
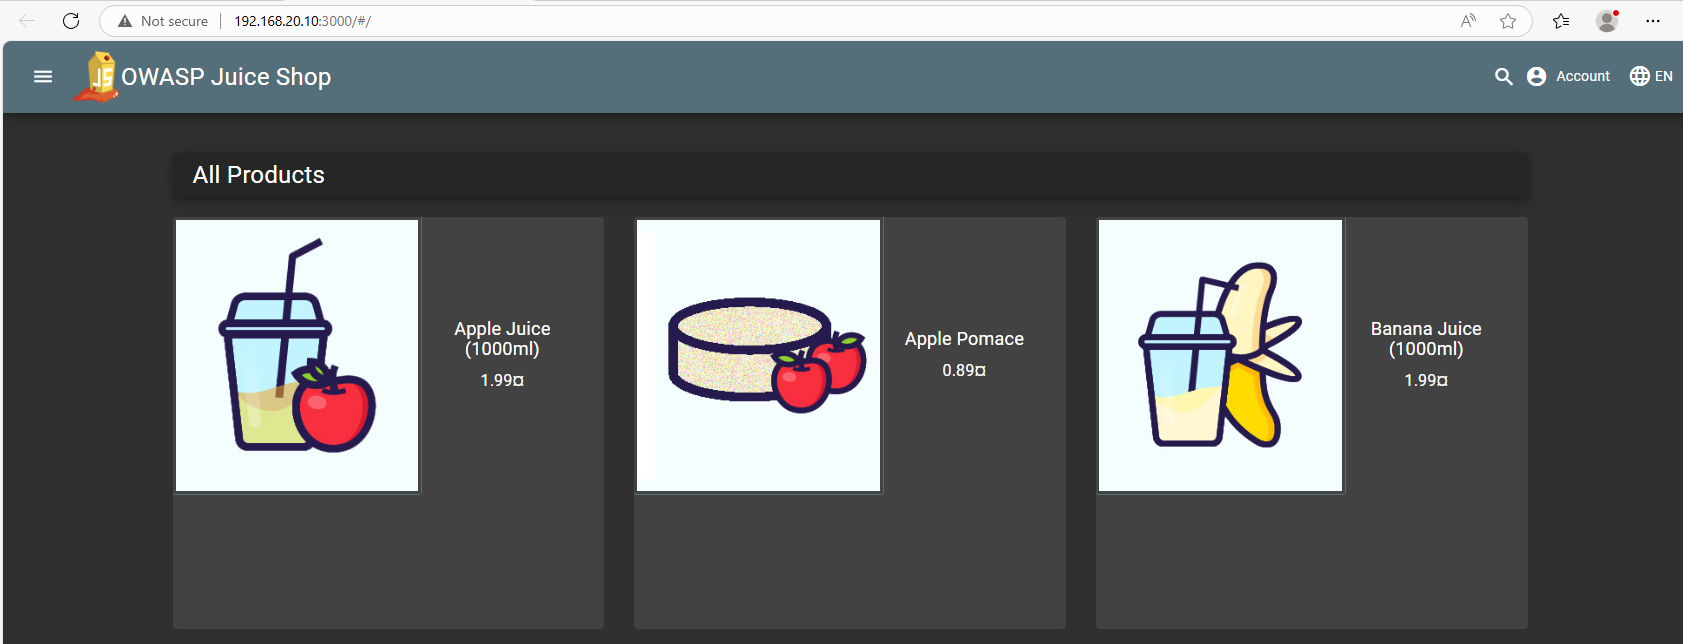
No problem aswel, so let’s see if we can see it from the outside aswel to replicate a real world case since we would ideally have people connecting from everywhere in the world. I will try to connect with my own real machine.

Obviously we can’t connect like that, so we will have to find a way to make it available for everyone.
For that we will need to forward the port to the pfSense machine, since our real machine is connected to the pfSense machine (since it has a bridged connection) but has nothing to do with the VLAN where the webserver is.
To make that possible we will go to the pfSense web interface and go to Firewall -> NAT
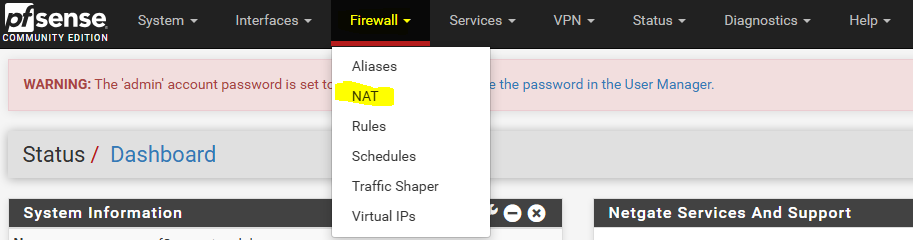
Once here we see that there is no port fordwarding rules so we will create a new one, this is what we need to do:
-Interface: WAN -Protocol: TCP -Destination: WAN (We will use the port 8080) -Redirect target IP: 192.168.20.10 (Web Server) -Redirect target port: 3000 (Port serving the website) -Filter rule association: Create new associated filter rule
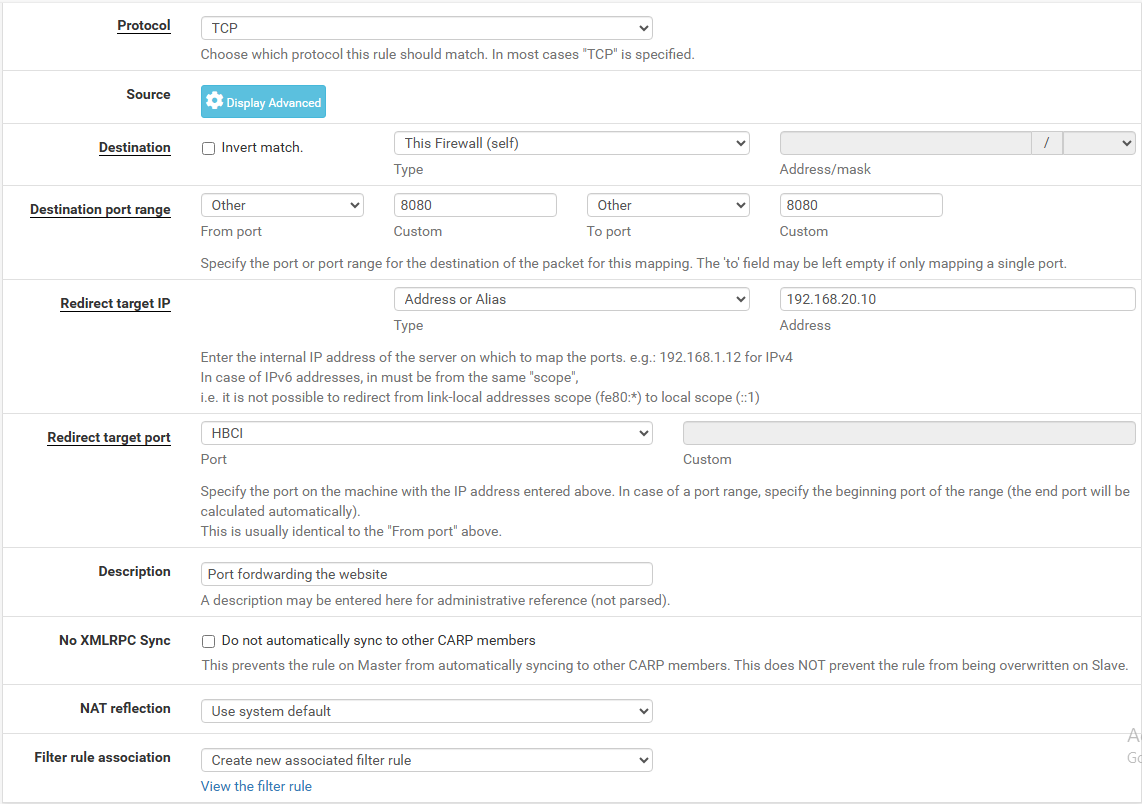
We can proceed to save the rule and can try to access the website from our machine.
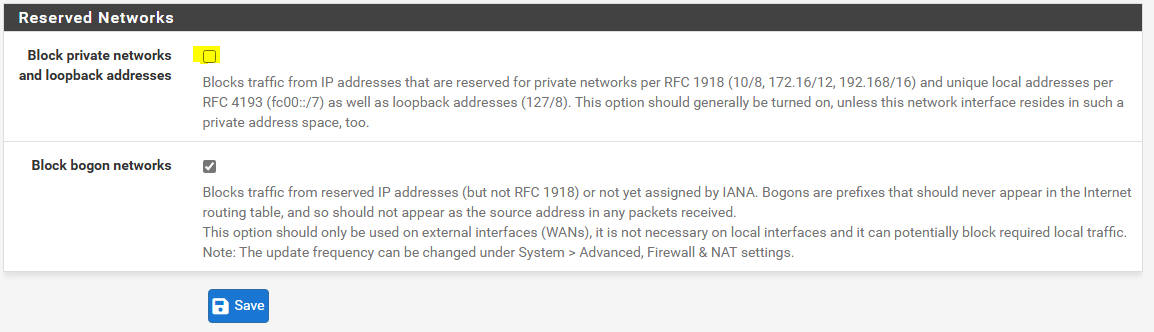
I got another error because I’m trying to connect from a RFC 1918 reserved IP address and if I go to Interfaces -> WAN, we can see in the configuration that I was blocking this kind of addresses, so I will uncheck this setting and save it:
After that we can proceed to try and access the machine from our real machine and we should have no problem:
After that we are all set up, our firewall is blocking all traffic to from the outside except the traffic to the website.
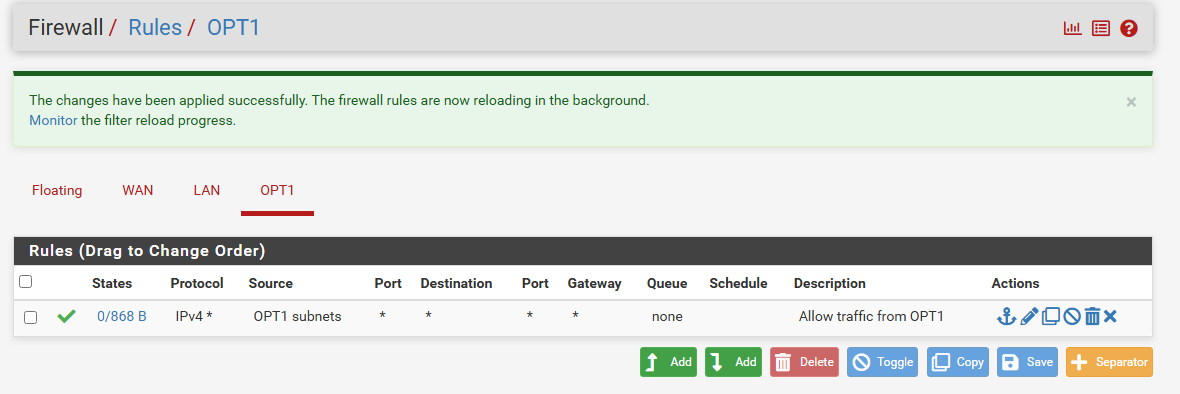
##UPDATES
Later on the configuration of the webserver I realised that the webserver didn’t have internet access, so I had to add one rule into the OPT1 allowing traffic: